Workflows UI provides a way to:
- Register a Composer DAG as a workflow in Gaia
- Trigger the registered workflow
- Delete a registered workflow if it is no longer needed
Navigation to the Workflows Page
- Go to the Left Navigation Menu
- Click on the menu item called Workflows
- The Workflows page will be displayed
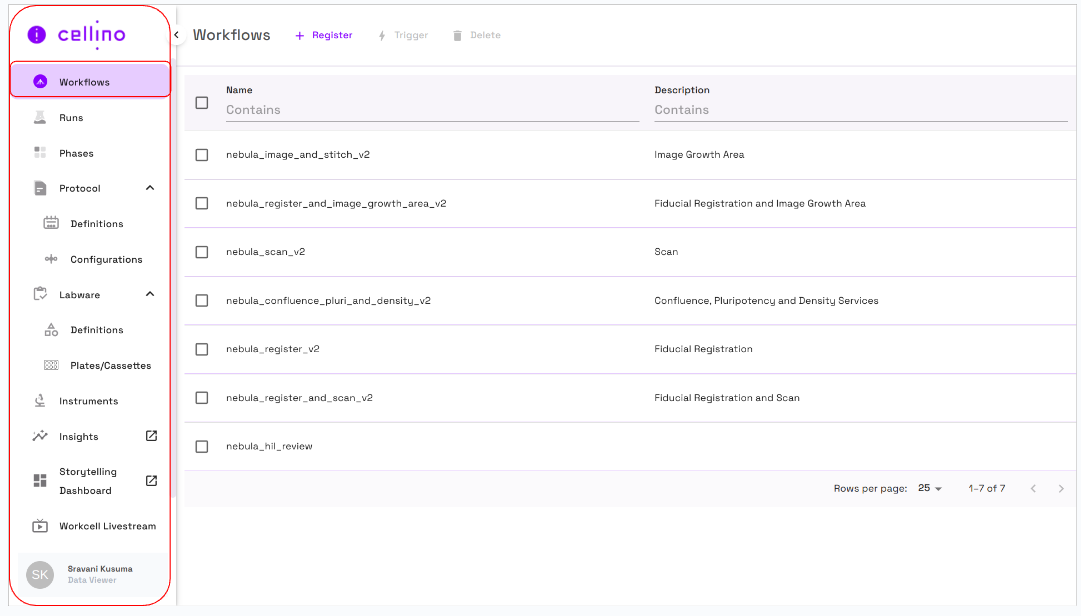
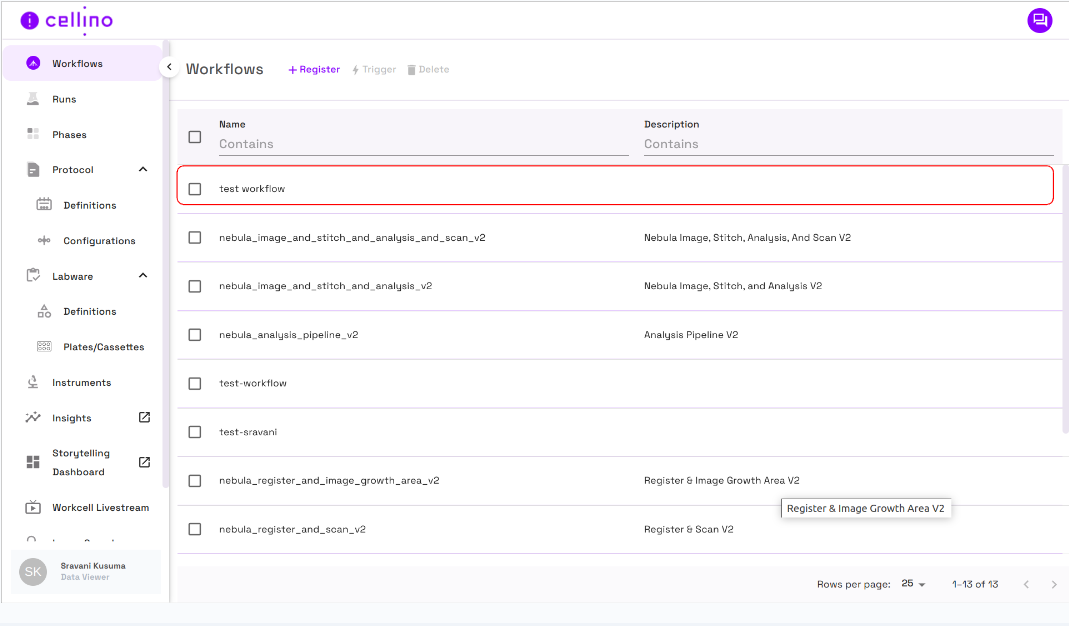
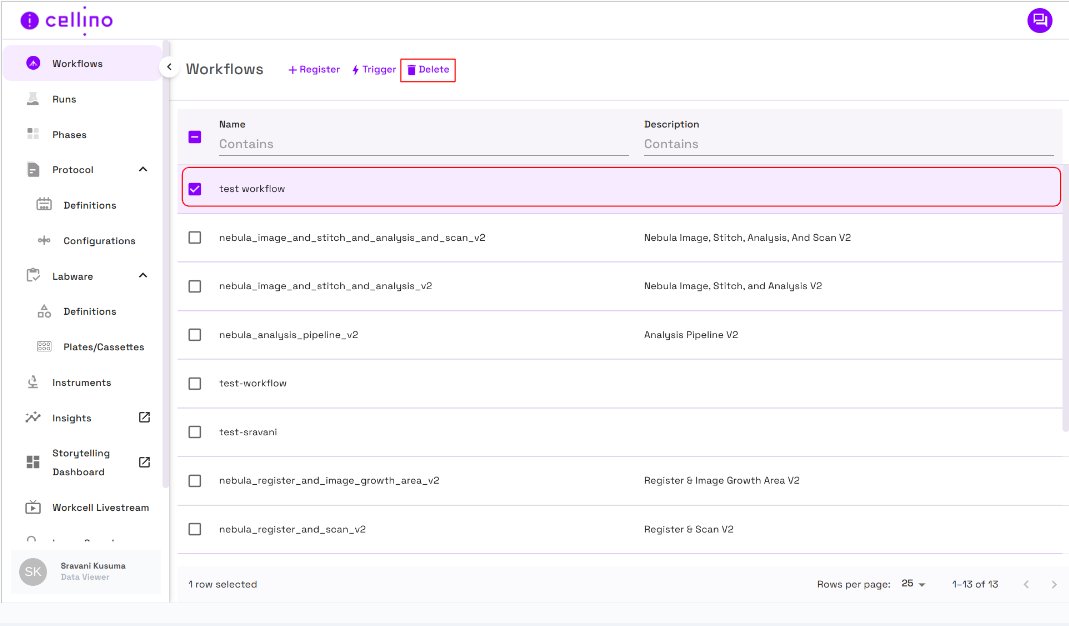
The Workflows Page Displays
- Page title and a set of action buttons at the top of the page.
- A table of registered workflows that consists of the following columns:
- Checkbox Column: Allows users to select a workflow by checking the corresponding checkbox.
- Workflow Name Column: Displays the name of the workflow.
- Description Column: Shows the description of the workflow.
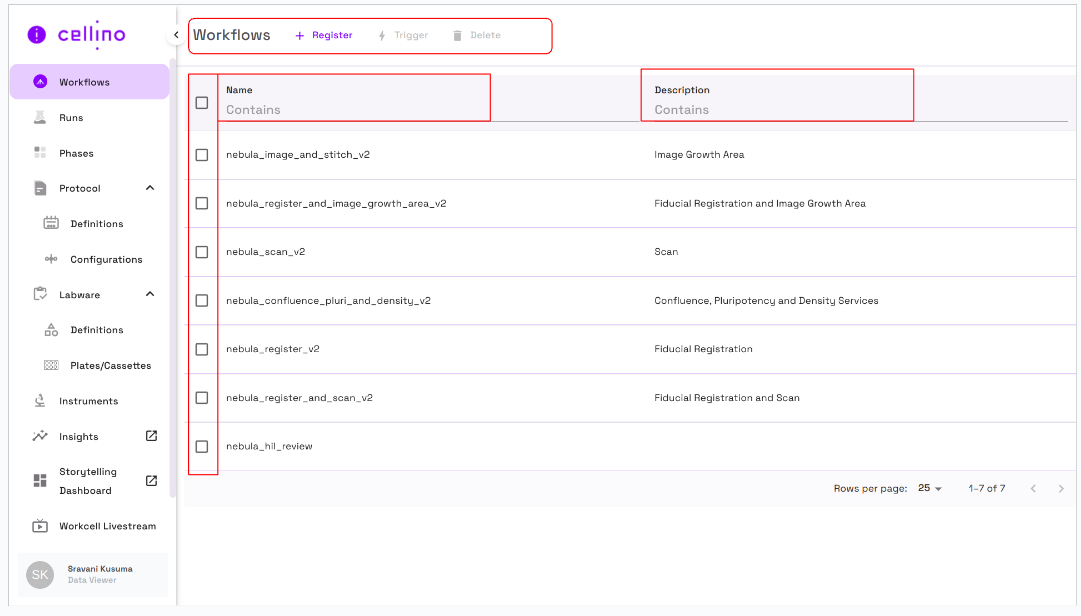
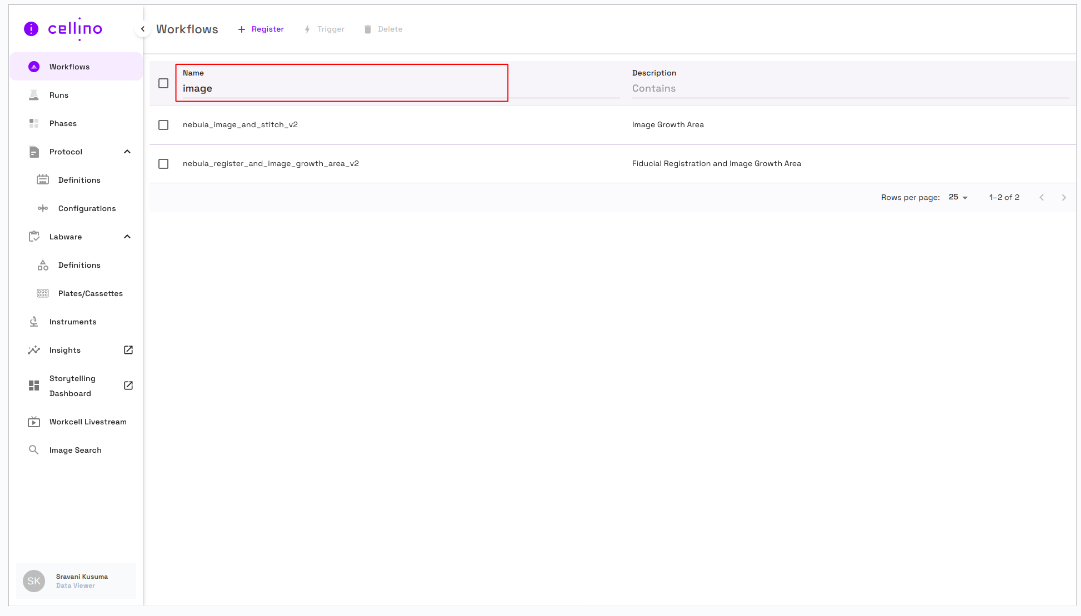
Enhanced Filtering
- Users can search specific fields by entering keywords, ensuring relevant results are displayed.
- Filtering is applicable for all columns that have a filtering option.
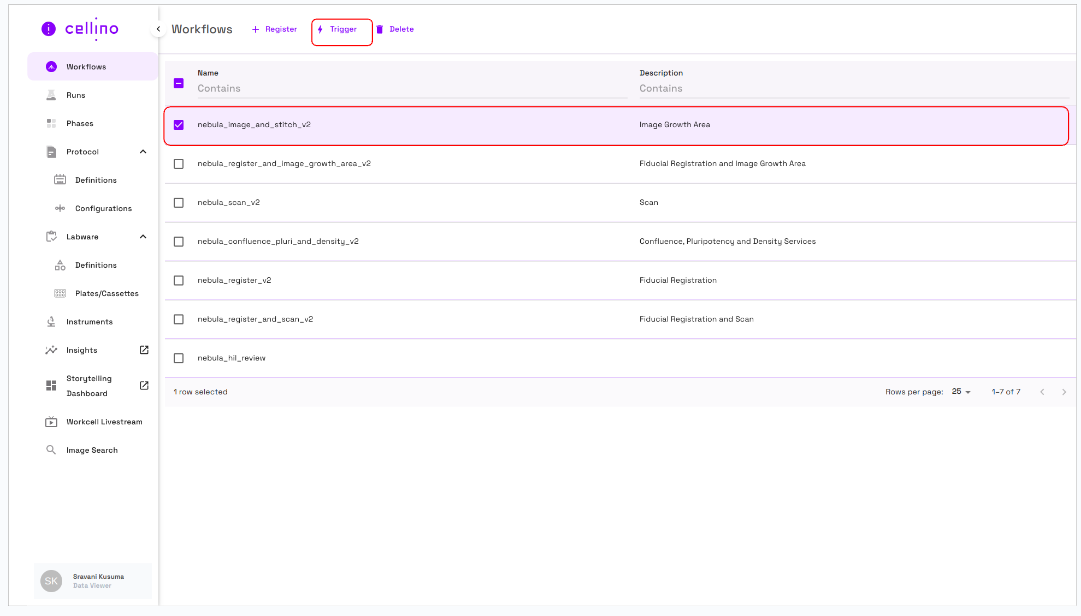
Triggering a Workflow
- When a user selects a workflow, the Trigger button becomes enabled.
- Once the user clicks the trigger button user can trigger a workflow.
- The Trigger Workflow Page displays:
- Workflow Name at the top of the page.
- Action buttons at the bottom.
- Dynamically generated fields based on the schema associated with the selected workflow.
- Different workflows may display different fields.
- Fields marked with
*are mandatory. - The trigger button is enabled once all required fields are filled in.
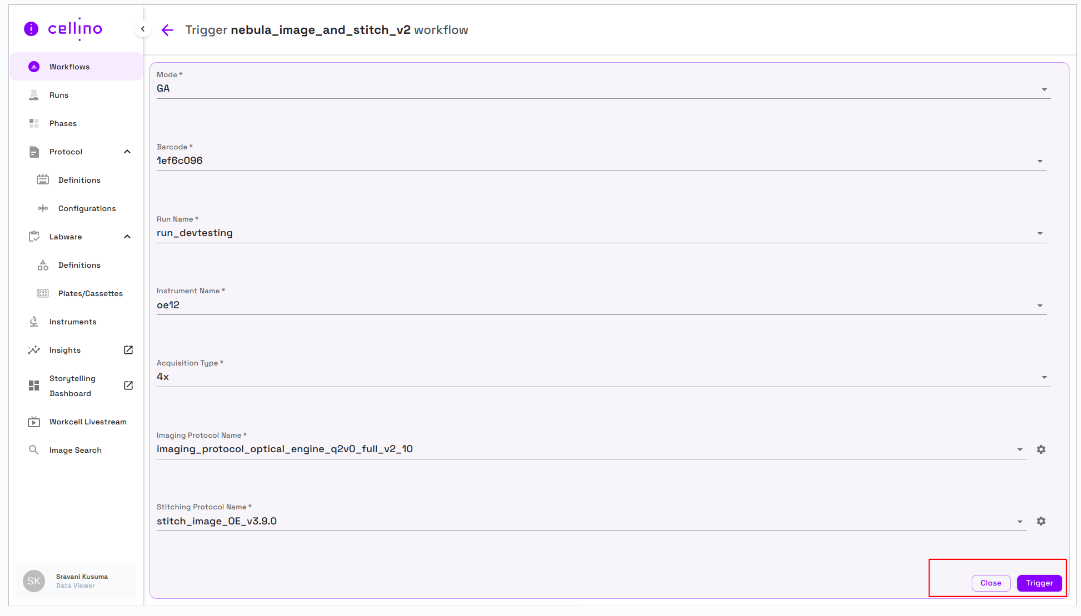
Autocomplete Fields
- Fields like Barcode, Run Name, Instrument Name, etc., may have autocomplete enabled.
- As the user types, matching options will appear in a dropdown below the field.
Triggering Confirmation
- Once all required fields are completed, the trigger button at the bottom of the page is enabled.
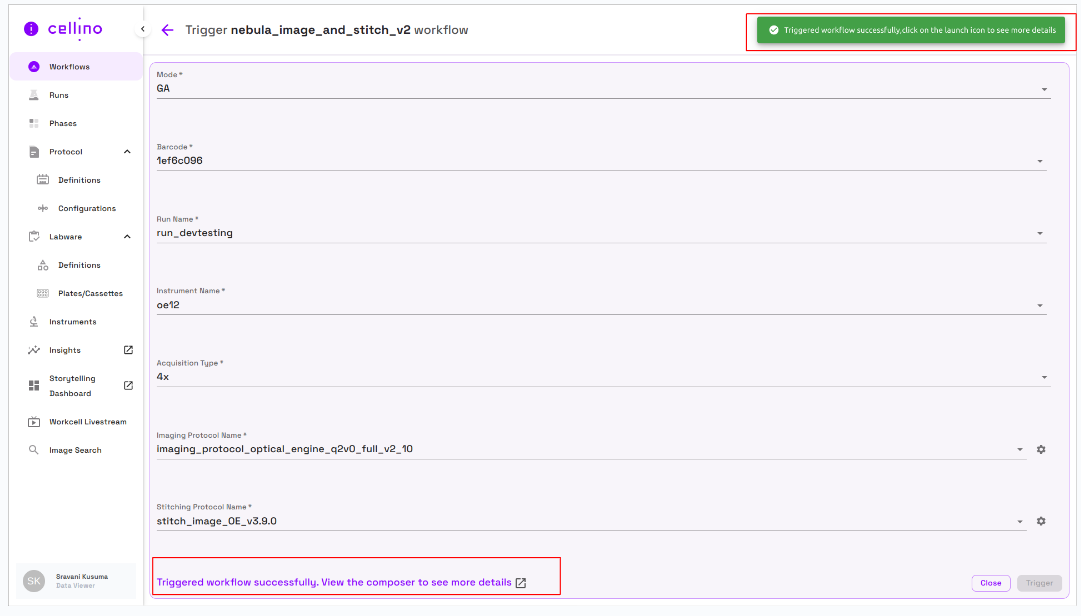
- Clicking the Trigger button executes the workflow.
- Users receive a snackbar message confirming successful triggering.
- A launch icon is available in the success message. Clicking it redirects the user to the Composer UI, where they can monitor progress and details.
Register workflow
- To register a new workflow click on the Register button on the top left corner of the page.

- Fill out the required fields
- Name
- Form schema
- Non mandatory fields
- Description
- The form schema field need to be a proper json in order to generate the dynamic fields when triggering the workflow.
- The detailed guide on how to create json schema can be found at Create Form Schema
- Once all the fields are filled click the Register button.
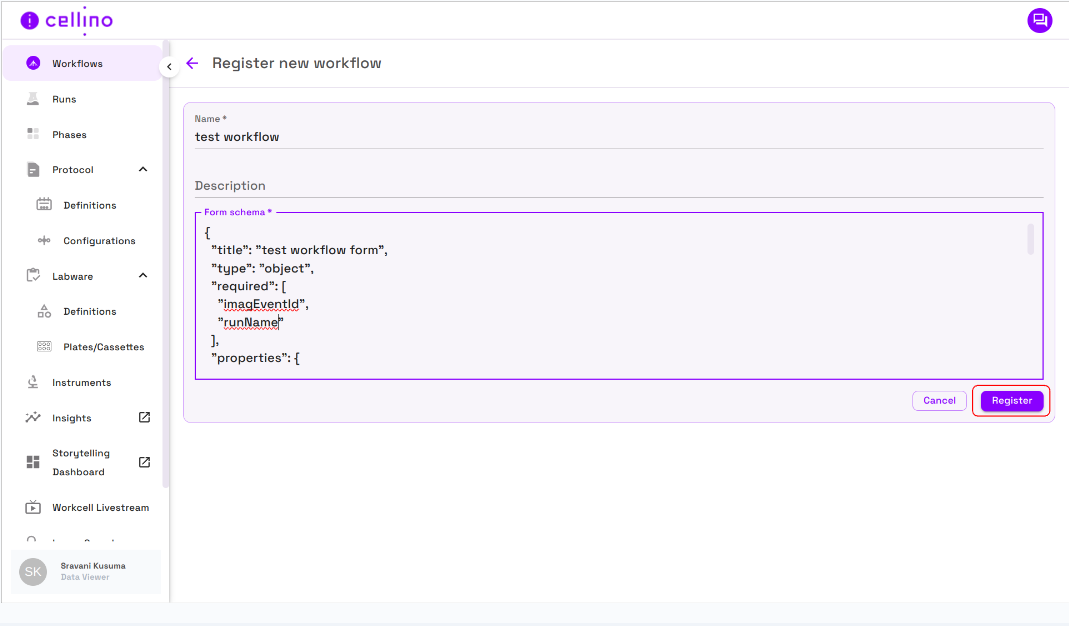
- The workflow will be created and we will be redirected to the workflows page
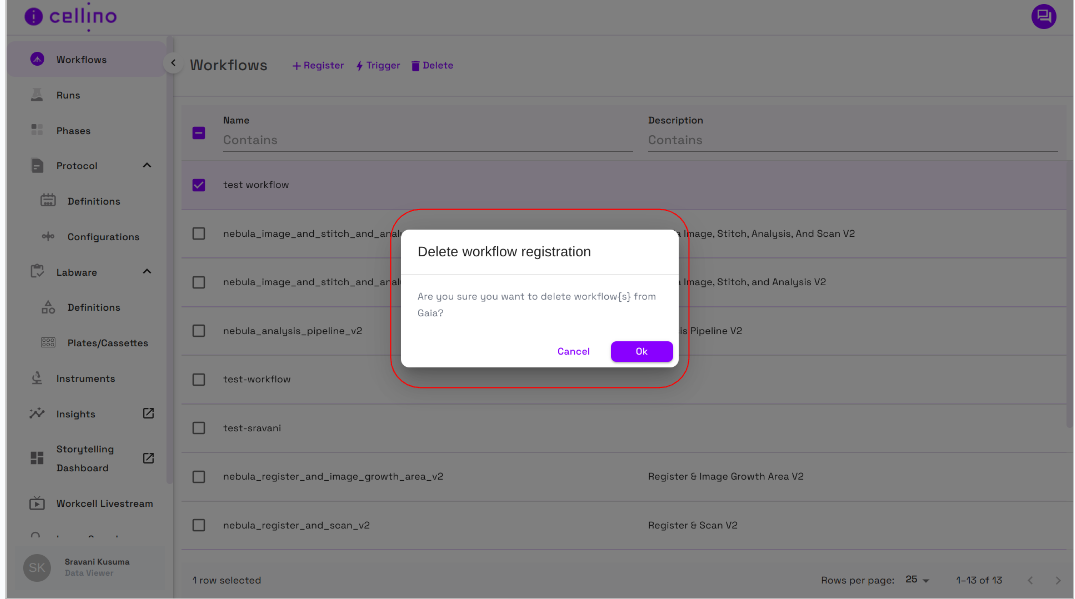
Delete workflow
- Select the workflow checking the corresponding checkbox for the workflow you want to delete.
- Click on the Delete icon.
- A confirmation popup will appear to confirm the deleting of the workflow
- Click Ok to delete the workflow.
Video Instructions
For detailed video instructions, refer to the following link: