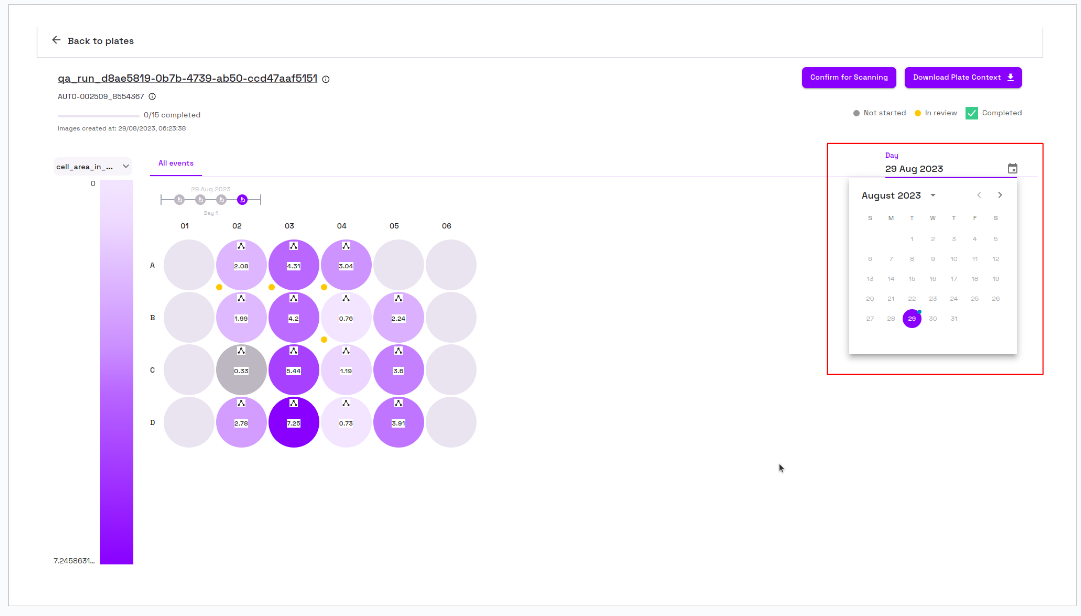
Navigate to Well Heatmap view page
- Go to the Left Navigation Menu.
- Click on the Phases Menu item.
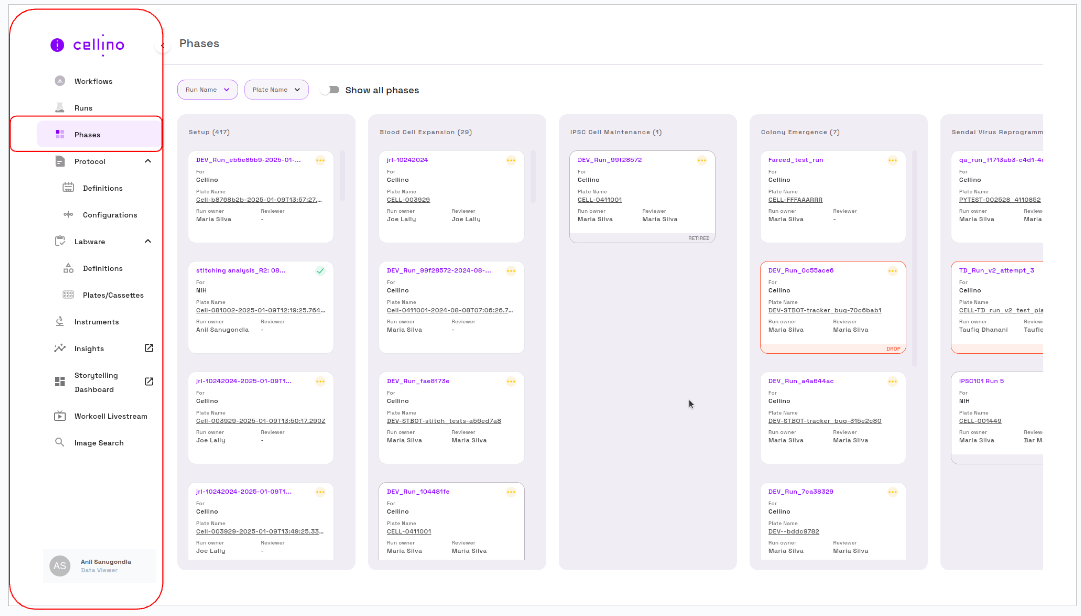
- On the Phases page, locate and click on any plate card.
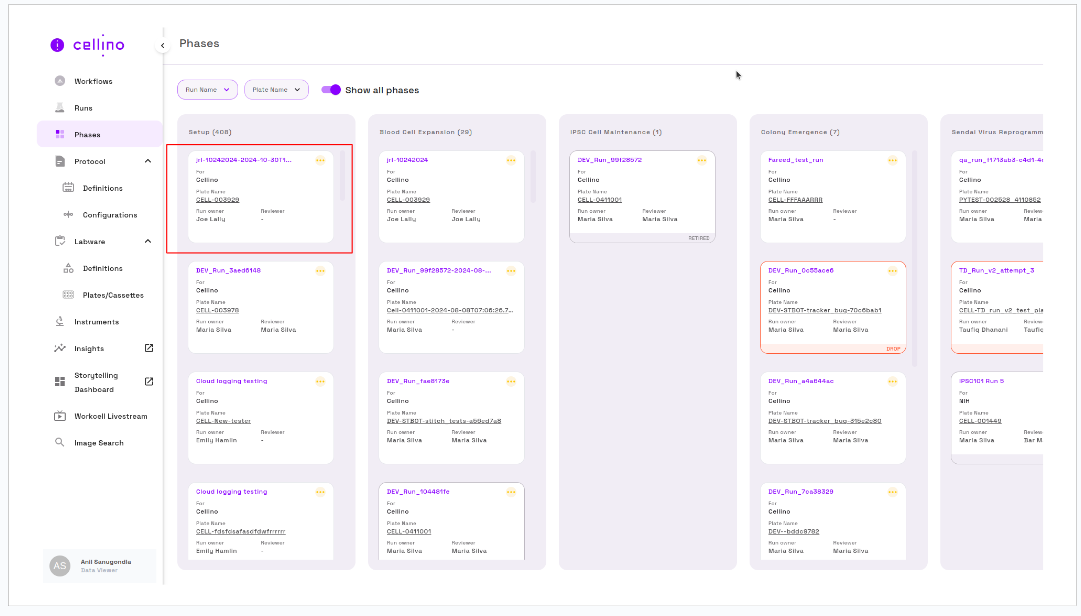
- The gaia application redirects to the Well Heatmap View page.
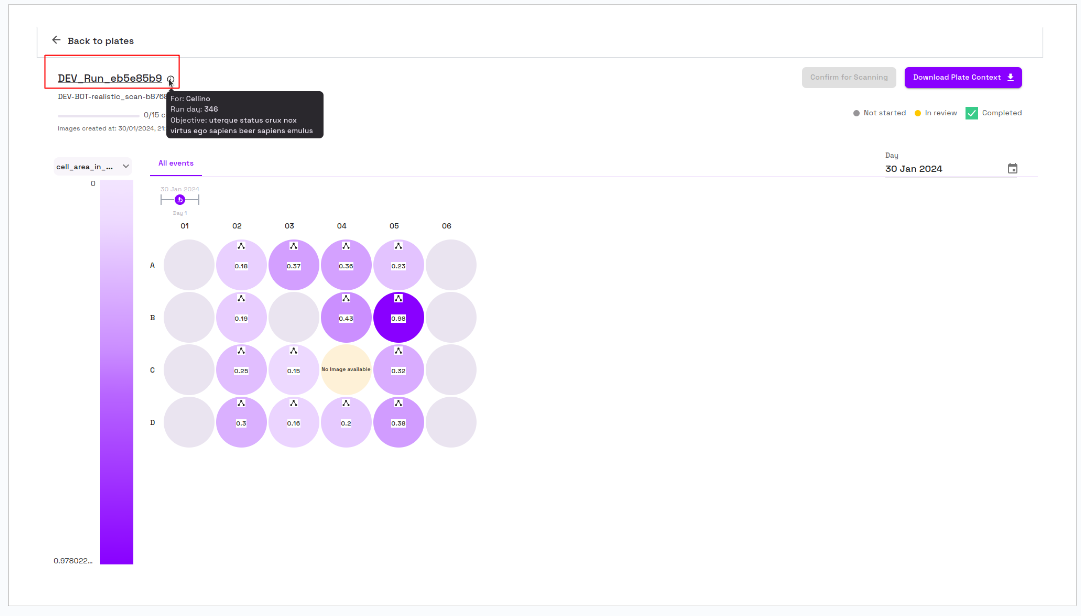
Well Heatmap View Page Details
Left Side Details
- Back Navigation: An option to navigate back to Phases.
- Run and Plate Details: Displays nformation about the run and plate details, including the creation time and date.
- Measurement Options: Information about different measurement options on well positions.
- All Events Section: Provides details about the imaging event date and 24-well,96-well,or Cassette information.

Right Side Details
- Action Buttons: Options like
Confirm for ScanningandDownload Plate Context. - Well Position Status: Displays statuses (Not Started, In Review, Completed).
- Date Picker: Allows users to select dates to view image events associated with those dates.

Simplified Run Information
- Below the Back to plates header, the Run Name is displayed.
- Clicking on the Run Name shows detailed information.
- Clicking the
ℹ️(info icon) provides a simplified view.
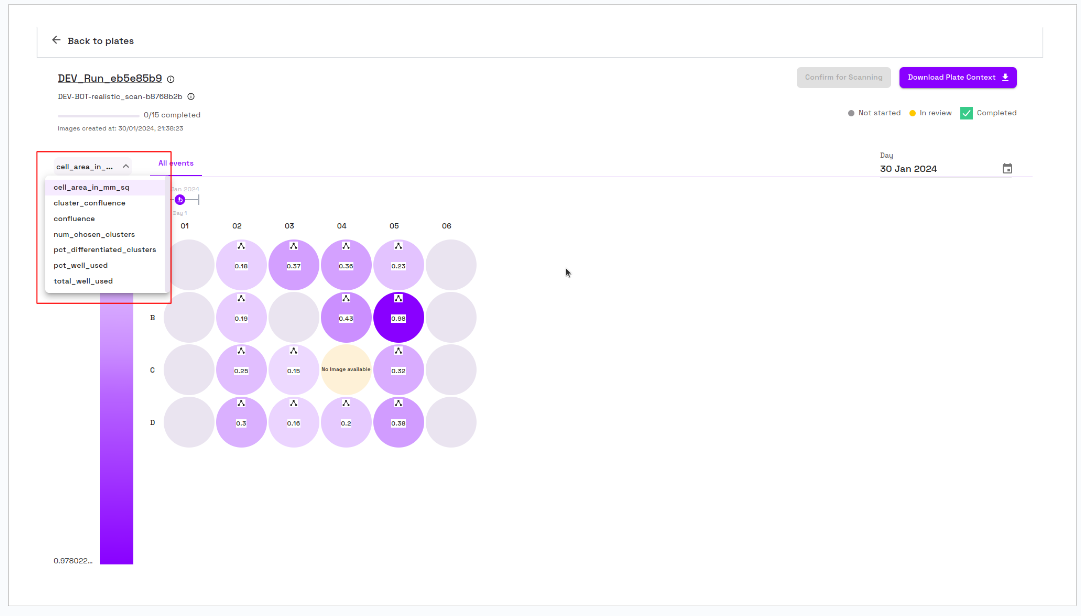
Measurement Option
- Below the Run Information, a dropdown allows users to select a measurement option.
- Based on the plate selected different measurement options are shown dynamically.
- When user selects any of the option, the corresponding measurement value is shown on each of the well.
- The gradient of the wells also change based on the selected measurement value.
Passage Lineage
To view passage lineage:
- Click on the Passage Lineage icon on a well position.
- The Passage Lineage view will display the hierarchy.
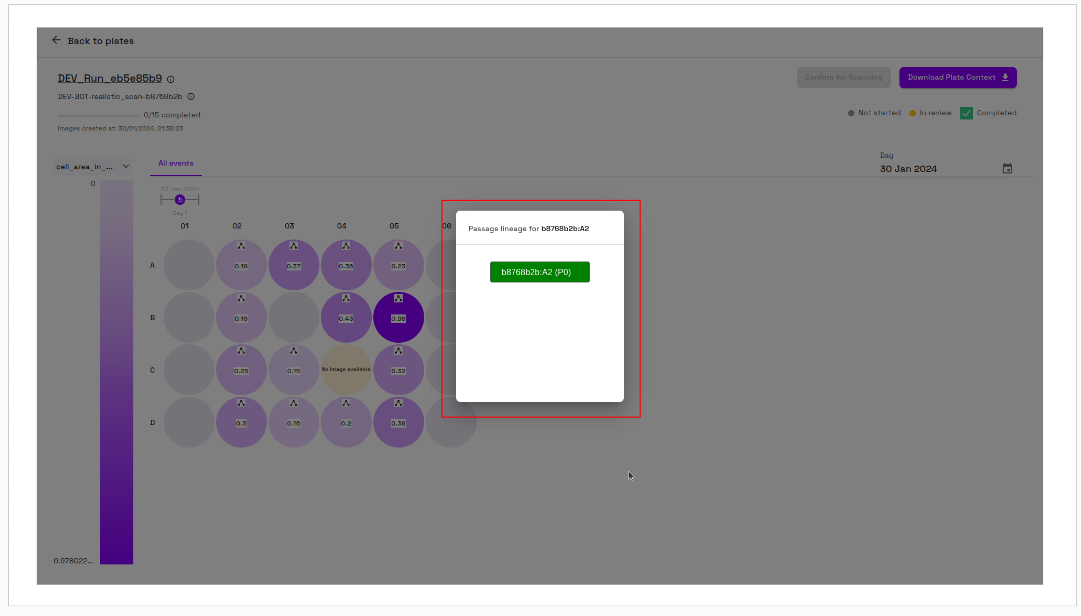
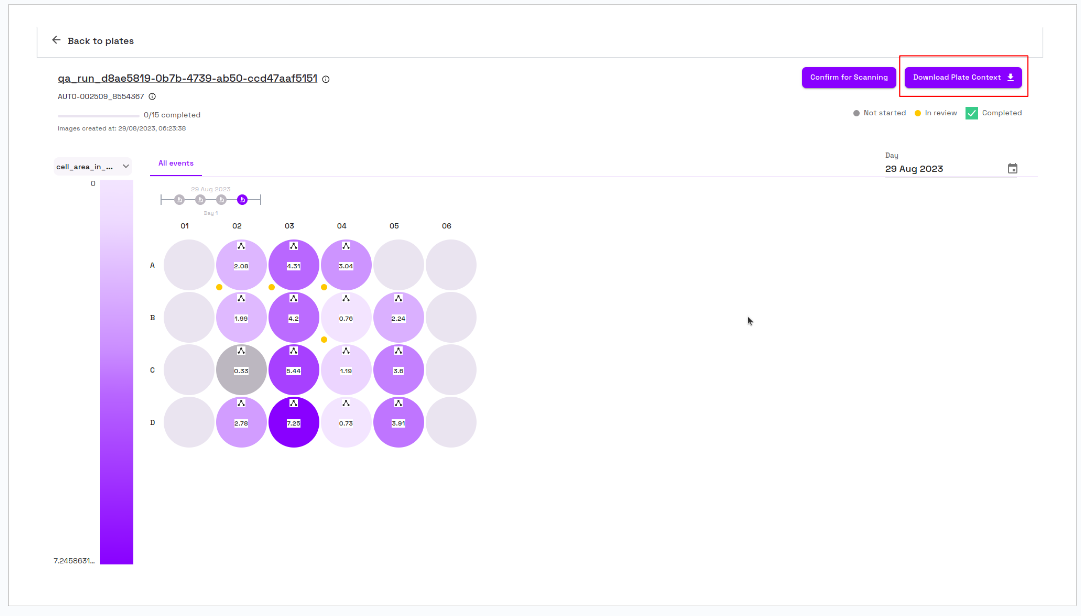
Plate Context
- Click the Download Plate Context button (top-right corner).
- Upon clicking the Download Plate Context button, a dialog box will appear displaying the well options that are ready for scanning.
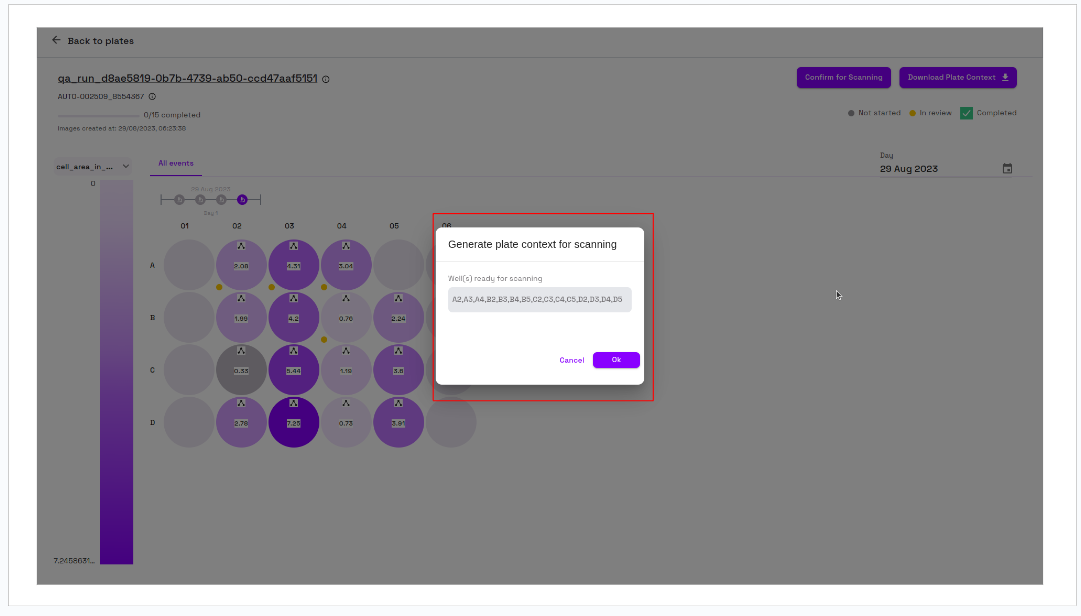
- Clicking
OKdownloads a JSON file to the local machine.
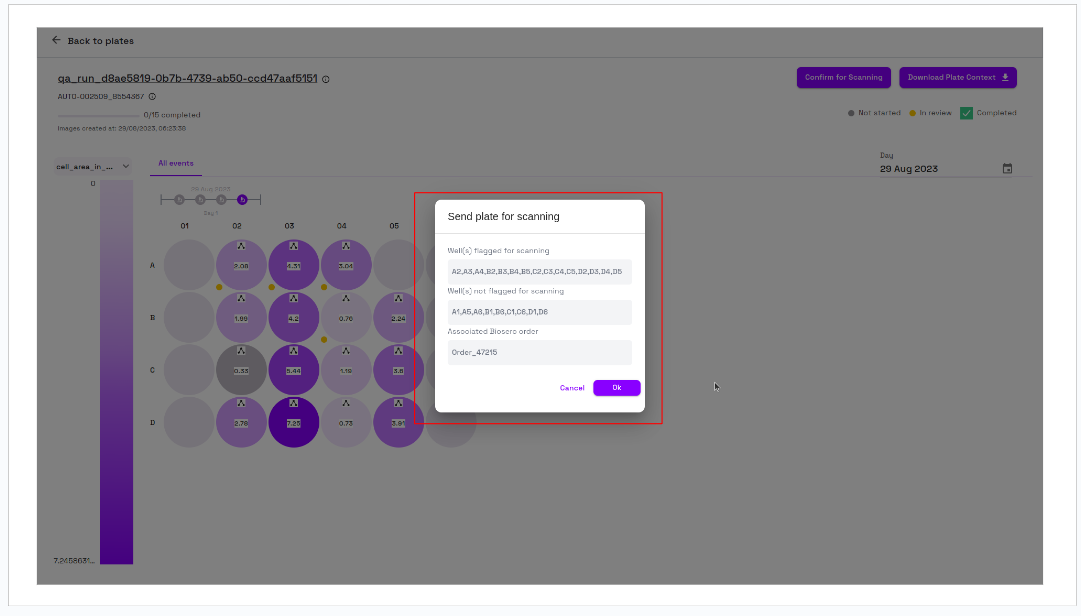
Confirm for Scanning
- Click the Confirm for Scanning button (beside Download Plate Context).
- This button is enabled only if an active HIL order is associated.
- Once enabled, clicking the button will display a dialog box showing the well positions that are currently in Scan status, which can then be sent for the scanning process.
- Clicking
OKconfirms the well positions for scanning.
Date Picker
- Click on the **Date Picker **to select a date with available image events and view the corresponding data on the page.
Video Guide
For detailed video instructions, refer to the following link: