Summary
The Erase and Brush tool introduced in Gaia addresses the shortcomings of the current point-based editing mode by enabling users to efficiently fix cluster contours, create missed clusters from scratch, and split large clusters into smaller ones, reducing errors and improving usability.
Navigate to the Brush or Erase Tool
- Navigate to the left panel
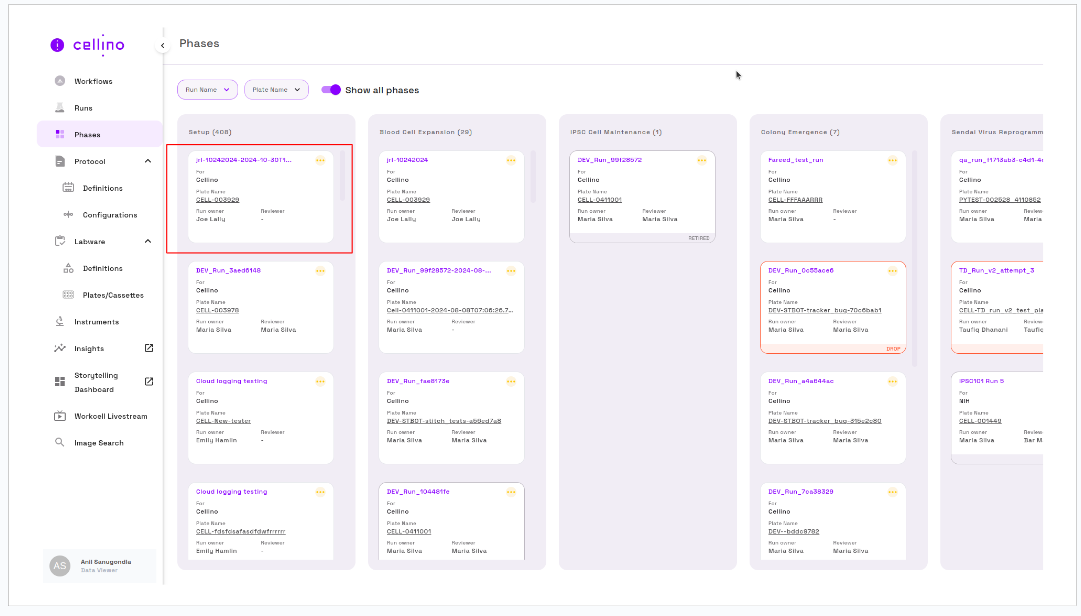
- Click on 'Phases' menu item
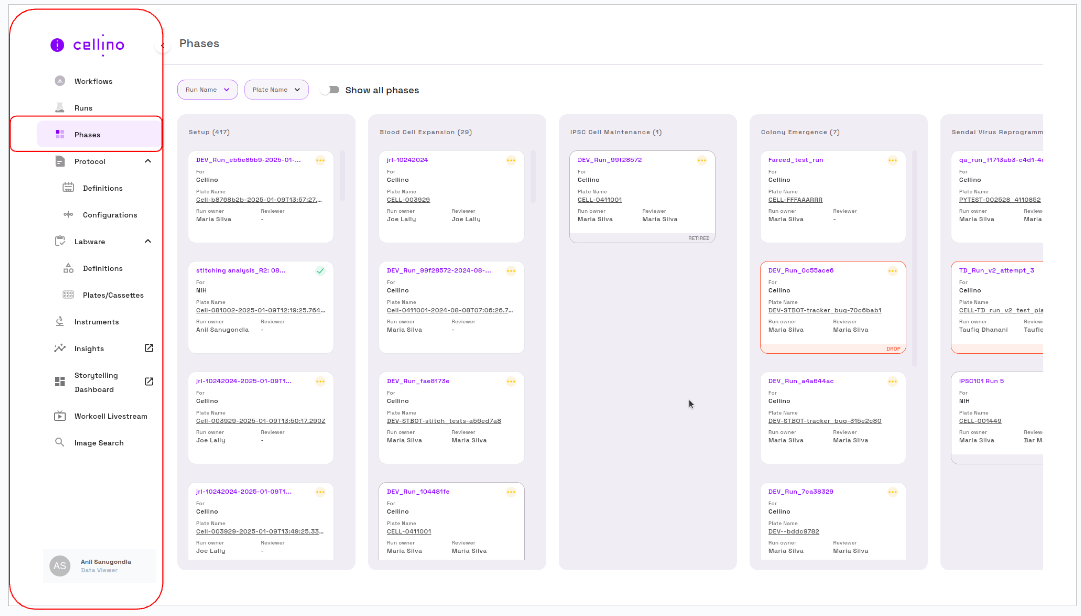
- Click on the plate card under Phases to navigate to the Well Heatmap View page.
- On the Well Heatmap View page, click on a well position to navigate to the Image Viewer page.
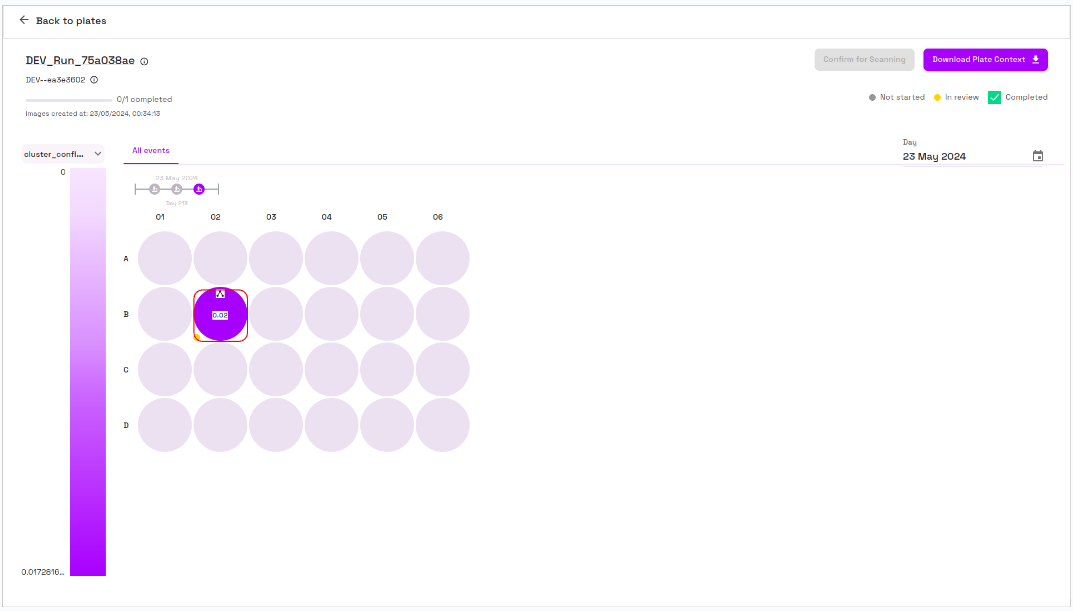
Image Viewer Page Details
Top Bar Options
- On the top left back button to go to the Well heatmap view page.
- Besides that, there is an option to change the well position by selecting it.
- Besides that, there is an option to adjust the Z-axis zoom level using the indicators.
- Besides that, there are a bunch of options that help in creating:
- Polygon
- Findings
- Patch objects
- Measurement

Left Pane Options
- Plate name details
- Scan Objects
- Clusters
- Colonies
- Findings
- Patches
- Inferences
- Fluorescence
- Brightfield
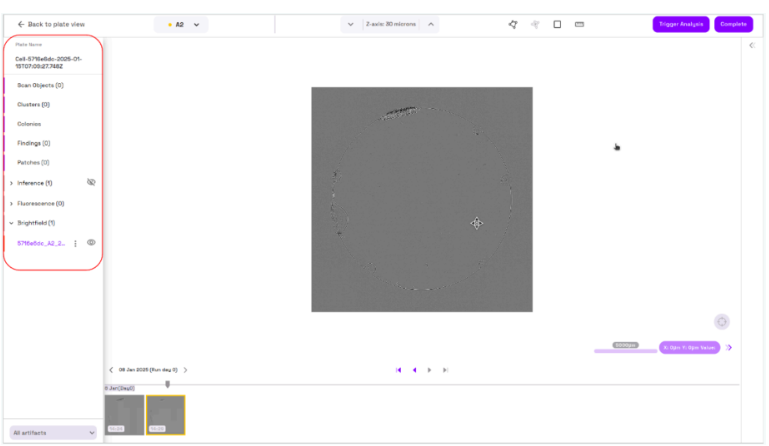
Center of the Page
- A multiscale base image with X, Y, and Value information.
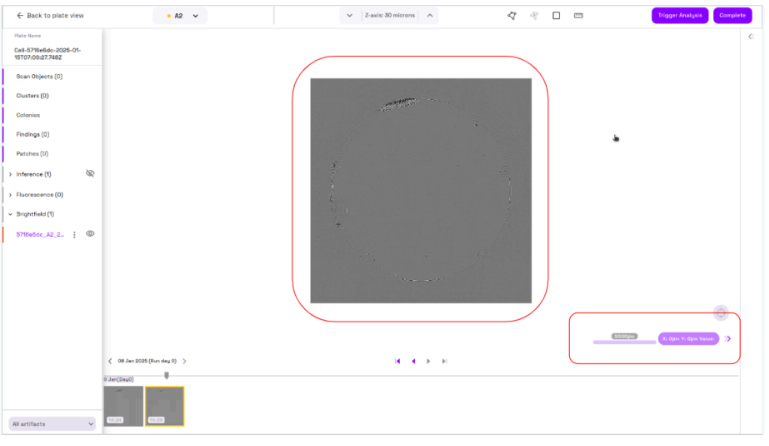
Bottom of the Page
- Image carousel for all the time points associated with the well and plate combination.

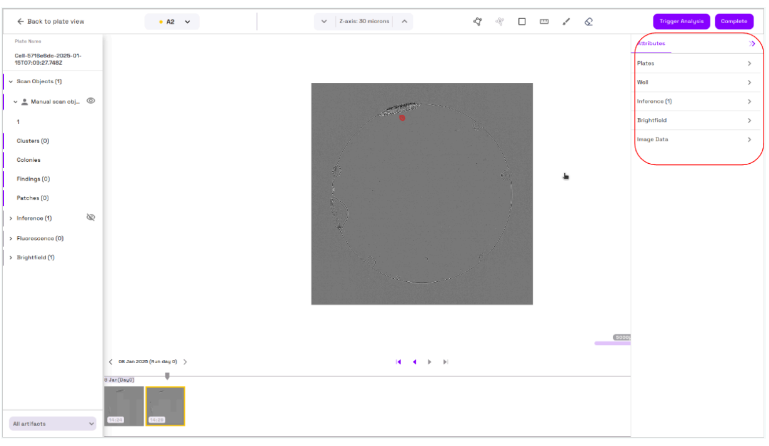
Right Pane Options
- Default Options
- Plate information
- Well information
- Brightfield information
- Image Data information
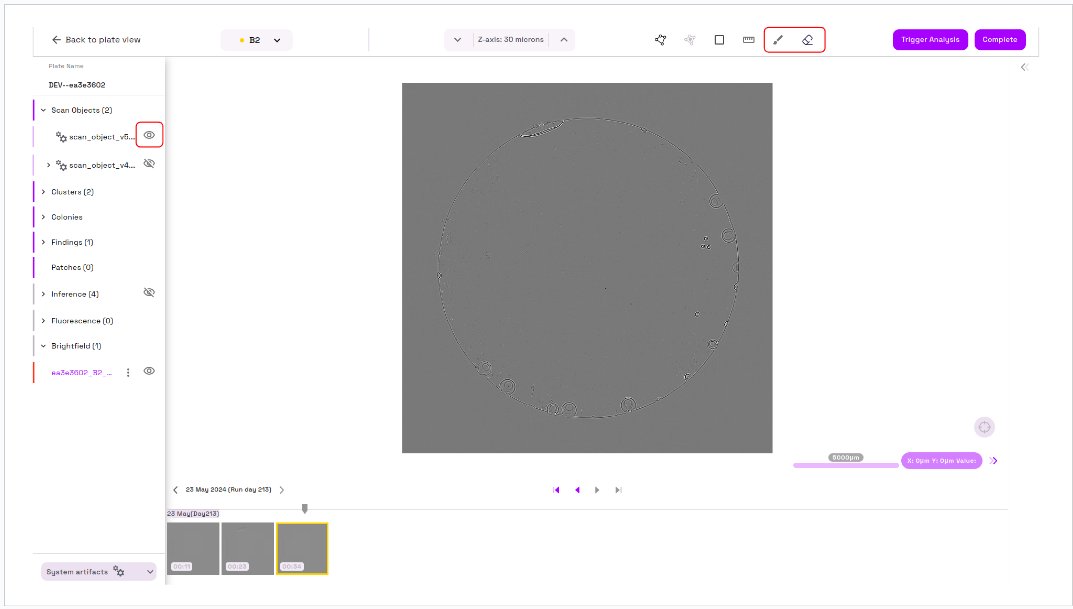
How to Get Into Brush or Erase Tool Mode
- In the left pane, identify the artifact (Scan or Cluster object).
- Expand the Scan Object and locate the hide/unhide icon next to the submenu item (Reference Analysis Request).
- Click on the icon to unhide it.
- The Brush and Erase tools will appear on the top bar next to the Measurement tool.
- If no Scan or Cluster objects are available, the Brush and Erase tools will not be displayed.
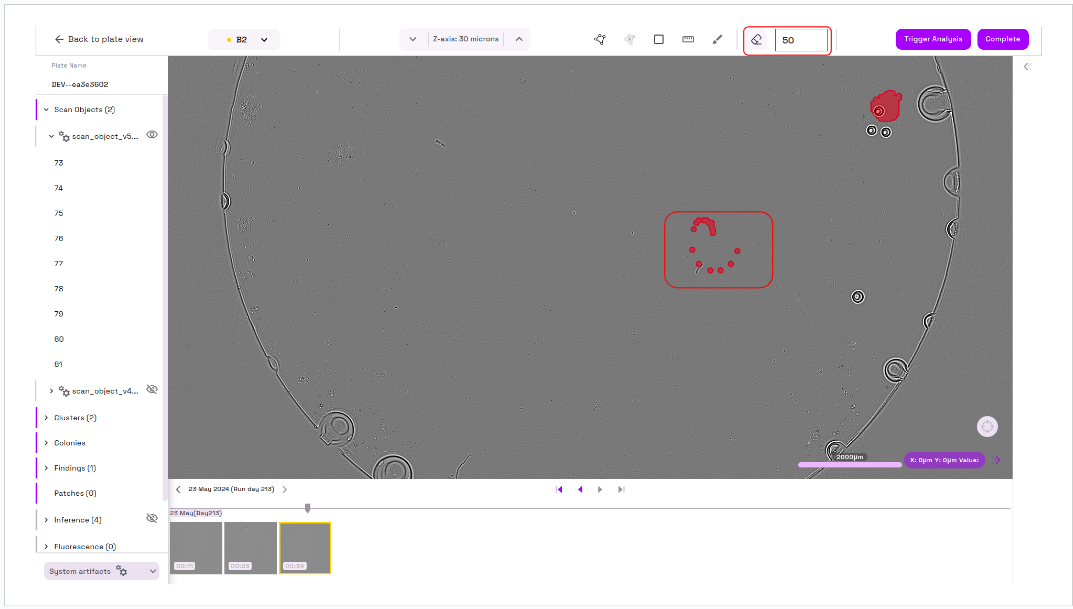
How to Use Brush Tool
- Click on the Brush tool icon located next to the Measurement tool.
- Adjust the brush size by either typing a value into the field or using the up and down controllers.
- Navigate to the center of the page where the image is displayed and draw on the area of interest to create a Scan object.
- Note: Zooming on the image is disabled while the Brush and Erase modes are enabled.

How to Use Erase Tool
- Click on the Erase tool icon located next to the Brush tool.
- Adjust the erase size by typing a value into the field or using the up and down controllers.
- Select the area of interest to perform the erase operation.
- Using the Erase tool, the object can either be divided into different objects or completely erased.
Link to the Video
For detailed video instructions, refer to the following link: